 |
| What homeschoolers think of when they hear 'high school science' |
Note: Photos below include a dissection specimen which may be distressing.
Homeschoolers often dread the middle and high school years because the subjects seem too difficult, and they lack funds or equipment. Ironically, Covid partially allayed these fears because classes moved on-line so now an entire year of virtual labs can be found. However, hands-on experience is still a more effective means of learning for several students, so we hope the following can encourage others to be creative in seeking options.
Goal: In our case, we had a group of middle school students who would be taking Biology next year and had different levels of exposure to its topics. We designed a four week series of lab intensives, focusing on microscope use and dissection. The goal was to become comfortable with the tools used.
Where: We opted to meet at a member's house, though a church or community facility rental would also have worked. Note that dissection specimens are well preserved, so although there is some smell while working on it, it does not smell when everything is bagged up at the end of class.
Who: The LORD provided a alumni homeschool father who is also a doctor and who volunteered to teach our class. Other options would be asking independent teachers, e.g. HEART Academy (not affiliated), recent homeschool grads who are home from college, or the community at large, e.g. BioCurious. The class was open to middle and high schoolers, as well as parents who wanted to refresh their skills before teaching their younger students.
Equipment:
- Microscopes: We rented microscopes from HEART Academy (~$15/scope/month), some families borrowed from their charter lending library though they would plan to request months ahead. Families can also purchase them - Home Science Tools and AmScopes both have a section dedicated to high school microscopes.
- Slides, staining reagents: We rented prepared slides from HEART Academy (~$2/month), and purchased Methylene Blue and Eosine Y from Home Science Tools (~$5/bottle) as well as a box of glass slides (flat and concave) and covers.
- Pocket Microscope (optional): This was recommended by the teacher as a field microscope for students who want to keep exploring. Also suitable for younger children.
- 7" preserved rat: Since some students might take anatomy in high school, we wanted to cover mammalian systems. To keep the scope manageable, we went with a rat since a mouse might be too small to see the organs or, and a pig too large.
- Dissection tools: We rented the kits from HEART Academy (included in price above), but the most important tools were the sharp dissecting scissors and forceps (~$5 for both at Home Science Tools). For gloves, we used disposable gloves from Costco.
- Week 1: We learned the parts of a microscope and examined different slides, drawing them. Students were initially unused to squinting (most microscopes were monocular), and not losing focus when moving between their paper and eyepiece.
- Week 2: We collected pondwater and put it on a concave slide to observe. Students were amazed at the diversity of life when magnified. They also scraped their inner cheek cells and stained them using different dyes to observe (methylene blue highlighted the nucleus, eosine highlighted the cytoplasm).
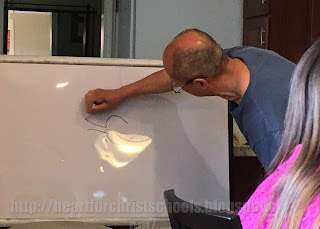
- Week 3: Our teacher first emphasized that dissection isn't for fun, but a tool to understand God's creation better. We defined terms - remembering that left, right are from the ANIMAL'S point of view (this worksheet is helpful). He provided various models using balloons and pumps on how our circulatory and respiratory systems work. Students then made their first incisions (with much squealing) and realized it is hard work to cut past the fur, epidermal, muscle layer and get to the organs. It is also very easy to cut too far. At the end of the session, we bagged up our specimens for the next lesson (they don't need to be refrigerated).
- Week 4: We covered the digestive system, and pulled out the corresponding organs. In the rat, the distinction between small and large intestine isn't as clear as in human's, nevertheless we had several opportunities to point out how finely God had made the systems, e.g. the loops and vilia to help maximize surface area and uptake absorption of nutrients. Our instructor had also bought some cow hearts so he could demonstrate the chambers, and poured water to demonstrate the valves preventing the liquid from flowing backward.


No comments:
Post a Comment